Adding an Email Persona
Follow these steps to set up an Email Persona in Eloquens:
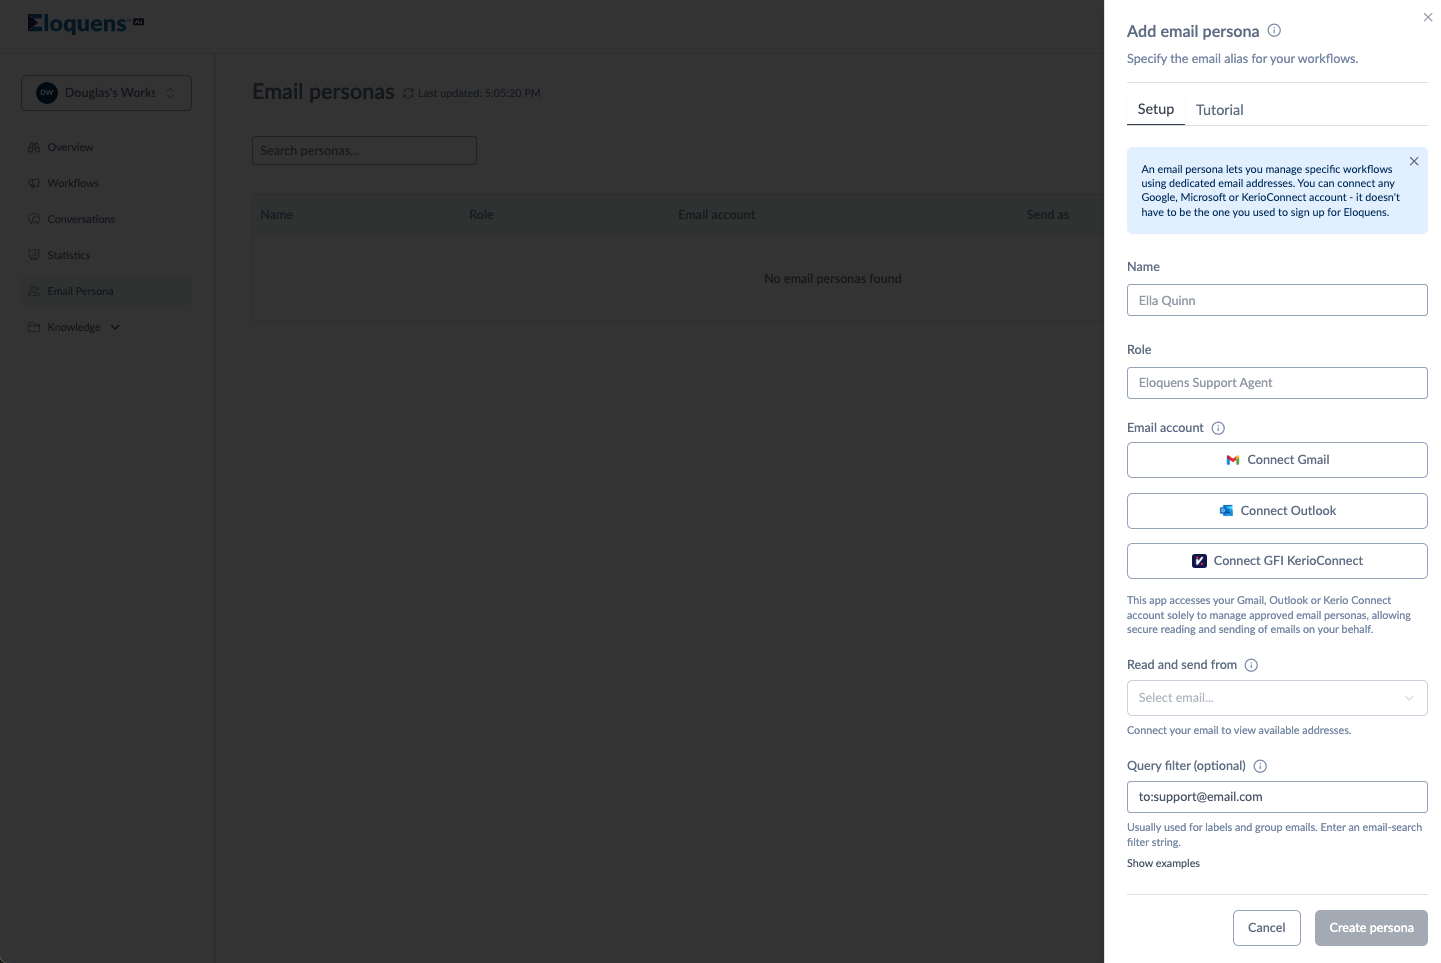
- Navigate to the Email Personas Page.
-
Select Add Persona and add details:
- Name: Enter the name of the persona (e.g., "Ella Quinn").
- Role: Specify the role this persona will represent (e.g., "Customer Success Manager"). The role serves as the identity of the Email Persona and will also be used as the sign-off in communications.
-
Connect Email Account:
- Choose between Gmail, Outlook or Kerio Connect:
- Click Connect Gmail, Connect Outlook or Connect GFI Kerio Connect.
- Authorize Eloquens AI to access the email account.
-
Select Email Aliases:
- Choose the alias created earlier to use as the sending and receiving identity.
-
Finalize Persona Creation:
- Review all details and click Create Persona.
Optional: Query Filter
If you want to use the Email Persona in a Google Group, or across different aliases of the same email account, you can use this setting:
- Google Group:
to:google.group@company.com - Multiple Aliases:
(to:hr@ignitetech.com OR to:hr@ignitetech.ai)
More Guide in:
- Gmail: Gmail search operators -
to:google.group@company.com label:("Important" OR "Customers") -from:john.doe@company.com - Outlook:Outlook search syntax -
to:support@company.com categories:("Important","Customers") NOT from:john.doe@company.com - Kerio Connect:Kerio search operators -
recipients:support@company.com NOT sender:john.doe@company.com
Edit an Email Persona:
- Go to the Email Personas section in the dashboard.
- Locate the persona you want to edit and click on the three-dot menu next to it.
- Select Edit.
- Update the Name, Role or Query Filter of the selected persona as needed.
- Click Save Changes to apply updates.
Delete an Email Persona:
- Navigate to the Email Personas section.
- Click the three-dot menu next to the persona you want to delete.
- Select Delete and confirm your action.
- Warning: If the Email Persona is attached to a Workflow, this action will remove it from that workflow.
Douglas Ho
Comments