The first time you sign in, Eloquens walks you through building an assistant from the mailbox you connect. You connect the inbox, Eloquens reads how you already handle email, and it proposes a name, what to answer, what to ignore, a tone, who to bring in and what it knows. You confirm or change each part in a short conversation, then switch it on. The same guided path is available later for every new assistant you create.
Step 1: Connect your inbox
- On the Let's connect your inbox step, click Connect Gmail, Connect Outlook, Connect Kerio or IMAP mailbox.
- Approve the permissions at your provider (see Connect your mailbox for what each one is for).
- If the mailbox has several addresses, pick the one the assistant should send from and click Continue.
A green badge confirms that your inbox is connected.
Step 2: Let Eloquens analyse your mailbox
The next card reads Build your assistant from your inbox.
- Open What we access during analysis if you want the detail: recent email patterns, frequent topics and how you reply go into drafting the assistant's knowledge and behaviour. Nothing is sent, changed or activated during the analysis.
- Click Build my assistant.
Eloquens starts reading recent conversations and shows its progress while it works.
Step 3: Confirm what it proposes
The analysis turns into a conversation. Eloquens presents one card at a time and asks you to confirm or adjust it:
- Who it is: a name for the assistant and a short description of the business or team it works for.
- Handle or ignore: the kinds of email it should answer and the kinds it should leave alone. Add or remove items until it is right.
- Tone: how the replies should sound, with example phrasing.
- Who to bring in: the person to copy in when a message needs a human.
- How it sends: draft every reply for your approval, send when it is sure and hold the rest, or send every reply on its own. You can change this later on the assistant's page.
- Knowledge: what it learned from your mail, plus a chance to add documents, website addresses or extra instructions. It also lists questions it could not answer yet so you can fill them in.
- A first reply: a preview of how it would answer a real message from your inbox, so you can see the result before it goes live.
You can go back and change any card before the end.
Step 4: Switch it on
- When the conversation reaches Your assistant is live, click Let's go!
- If offered, choose whether to attach an authenticator app now. Skip for now is always available; you can set it up later from Profile.
You land on Home, where the assistant's first results appear as mail arrives.
Add another assistant later
- Open My Assistants and click Create assistant.
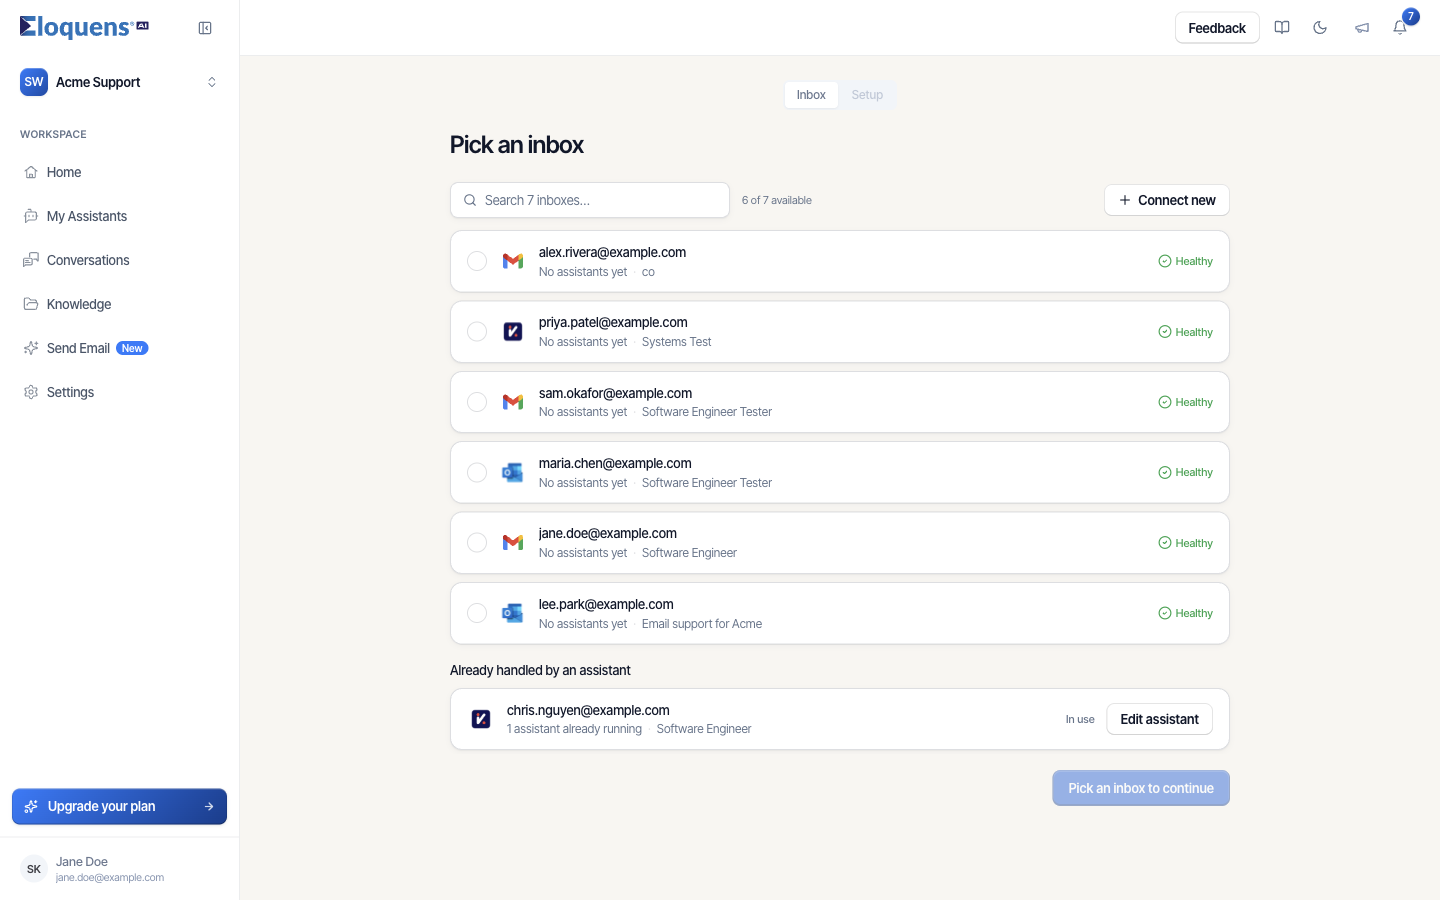
- On the Inbox step, titled Pick an inbox, choose a connected mailbox marked No assistants yet, or click Connect new to connect another one. A mailbox listed under Already handled by an assistant offers Edit assistant to open the existing one.
- Click Pick an inbox to continue.
- On the Setup step, click Build my assistant for me to run the same guided conversation for this mailbox.
Good to know
- Everything the guided setup produces can be edited afterwards on the assistant's page under My Assistants: its knowledge, rules, tone and response mode.
- Your mailbox is read, never written to, until you click Let's go!
- If you leave part-way through, Eloquens remembers the connected mailbox and offers to resume.
Related articles
- Connect your mailbox
- What is Eloquens AI?
- Workspaces and members
Soma Konate
Comments