An assistant is Eloquens working on one mailbox. It reads the email that arrives at that address, decides which messages deserve a reply, drafts or sends the reply, and brings a person in when a message needs one. Everything you set up in Eloquens hangs off an assistant: its mailbox, its rules, the Knowledge it reads, and who gets told about drafts.
One assistant, one mailbox
Each assistant is tied to exactly one connected email account. That account is where it reads from and where its replies go out from. One mailbox can only be driven by one running assistant at a time, so if you switch on an assistant whose mailbox is already in use by another running assistant, Eloquens asks you to resolve the conflict first (see below). You can have several assistants in a workspace, each on its own mailbox.
The My Assistants list
Click My Assistants in the left rail. The page is titled Assistants and lists every assistant in your workspace.
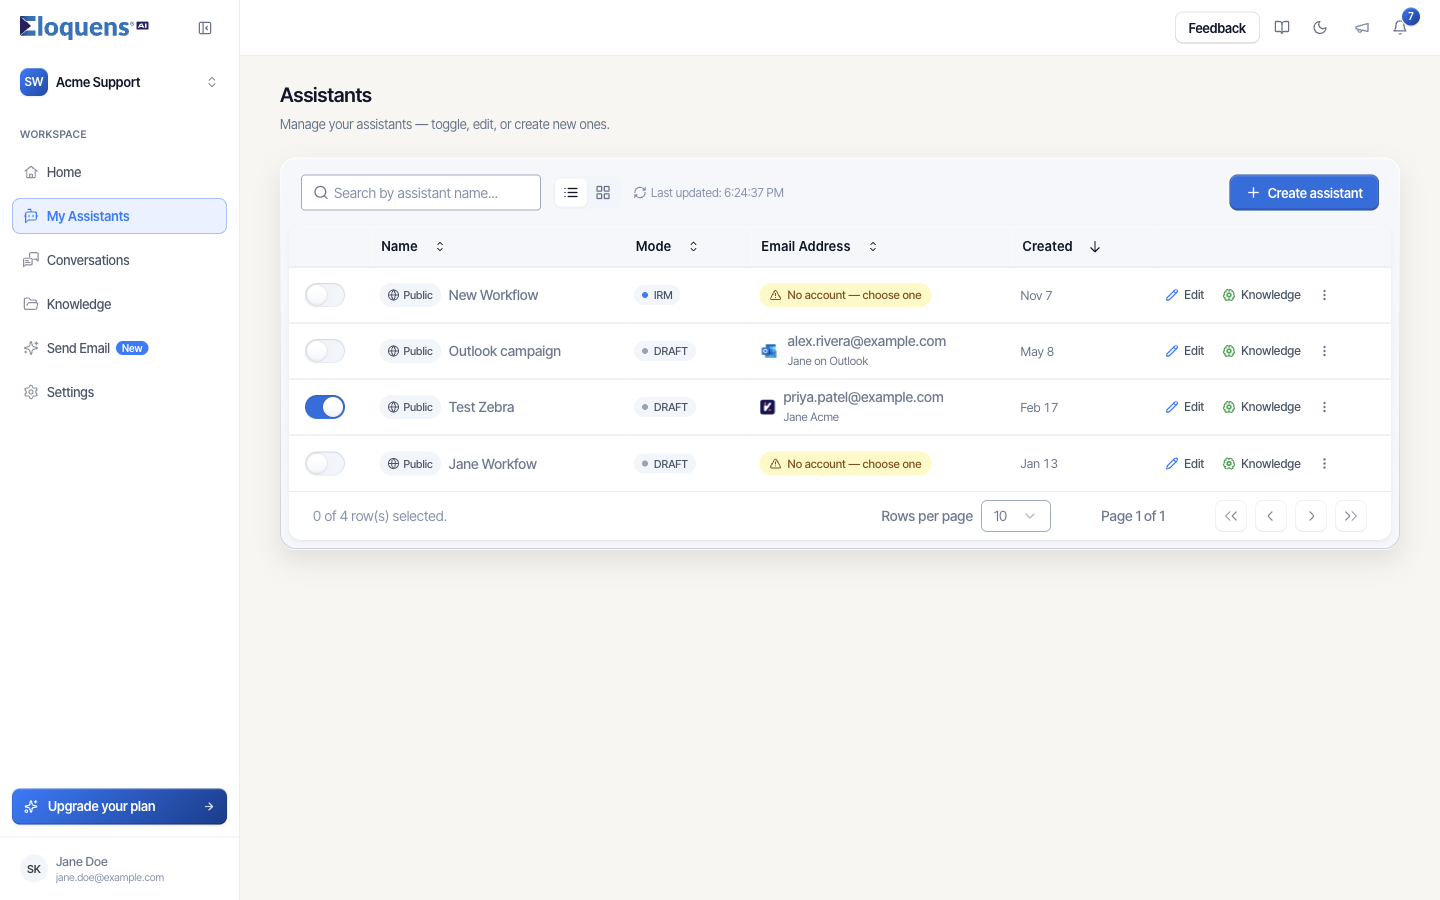
What you see on each row:
- The switch on the left. On means the assistant is running and handling new mail. Off means it is paused and nothing is read or sent.
- Name, with a Public or Private badge. Public assistants are visible to everyone in the workspace; Private ones only to you, the people you share them with, and workspace owners and admins.
- Mode: DRAFT, IRM or SEND. IRM is short for Intelligent Send. See Response modes: Draft Mode, Intelligent Send and Auto-Send.
- Email Address: the provider icon, the address the assistant uses, and the name of the connected account underneath. An assistant with no connected account shows No account — choose one; click it to pick a mailbox.
- Created: the date the assistant was made.
- Edit and Knowledge, two quick links that open the assistant page on the Assistant tab and the Knowledge tab.
- The More actions menu (three dots): Test, View Summary, View Conversation, Settings and Delete.
Above the list: a search box (Search by assistant name...), a list/grid toggle, a Last updated time, and the Create assistant button. Below it, Rows per page and paging controls.
Switch an assistant on or off
- Find the assistant in the list.
- Click the switch at the start of its row.
- Wait for the Updated! toast.
If the mailbox is already in use by another running assistant, a conflict dialog appears. It names the mailbox and the assistant currently using it. You can Cancel, Change email account (which opens this assistant's mailbox settings), or Switch Off the other assistant and start this one in one go.
Use the row menu
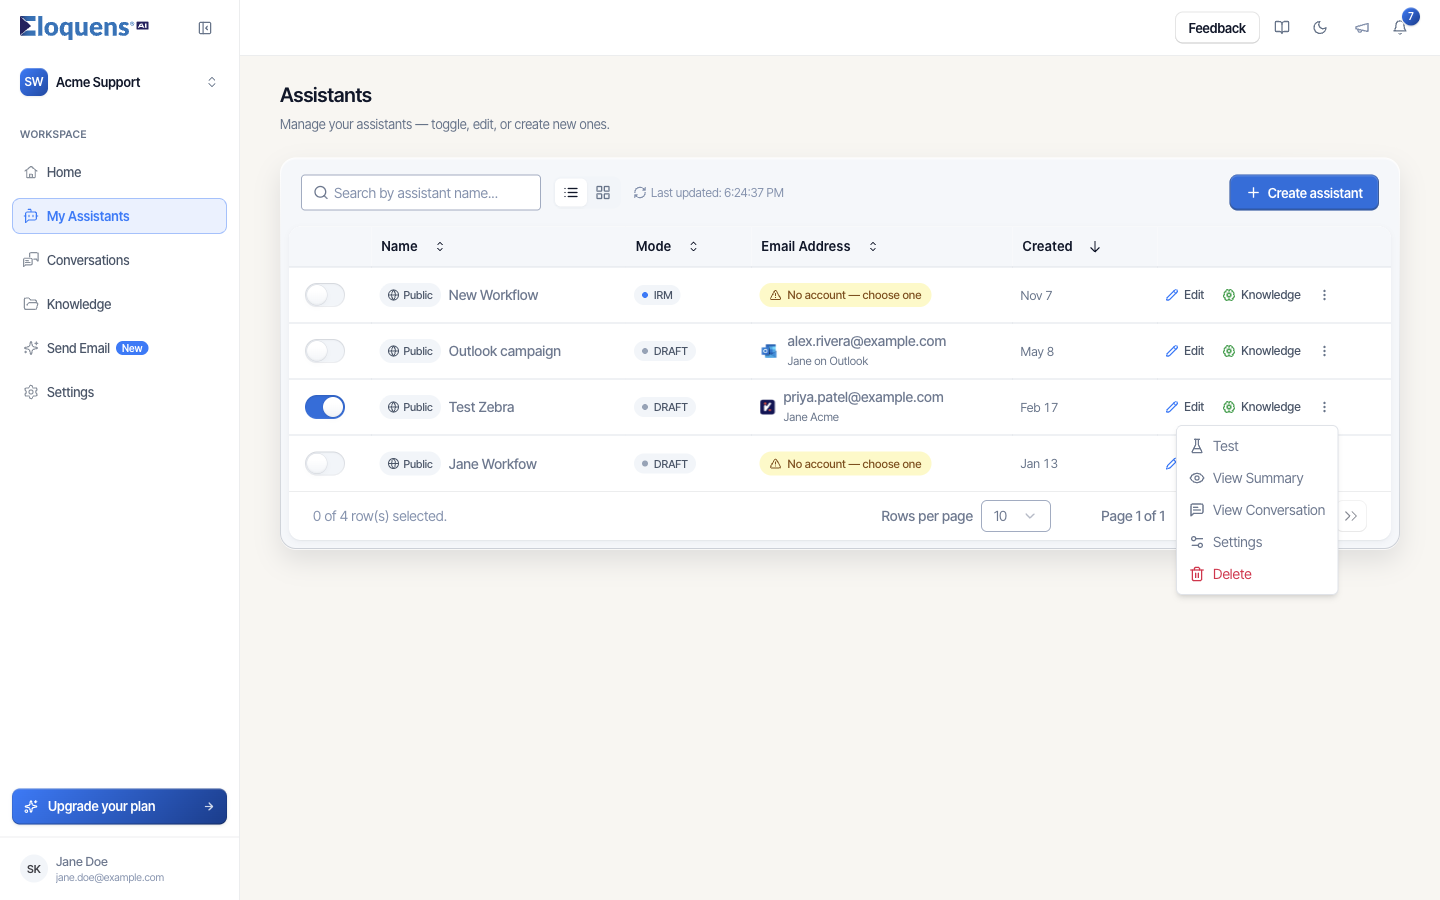
- Click the More actions button (three dots) at the end of a row.
- Pick one:
- Test opens the test dialog so you can run a sample email through the assistant without anything being sent. See Test an assistant before you switch it on.
- View Summary opens a read-only overview of the assistant's setup.
- View Conversation opens Conversations filtered to this assistant.
- Settings opens the assistant page on its Settings tab (notifications, inbox labels, CRM copies, CC and BCC).
- Delete removes the assistant.
Delete an assistant
- Open the row menu and choose Delete.
- Read the Delete Assistant? dialog. It says the assistant's Conversations and Statistics will be deleted as well, and that the action cannot be undone.
- Click Delete to confirm, or Cancel.
Deleting an assistant does not disconnect its mailbox. The email account stays under Settings and can be used by a new assistant.
Good to know
- Pausing is reversible and instant. Pause an assistant whenever you want to change its mailbox or take a break; switch it back on when you are ready.
- The list refreshes itself; the Last updated time shows when.
- Clicking an assistant's name opens its page. The page has four tabs: Assistant, Rules, Knowledge and Settings. See Edit an assistant: the four tabs.
Related articles
- Create an assistant
- Edit an assistant: the four tabs
- Response modes: Draft Mode, Intelligent Send and Auto-Send
- Test an assistant before you switch it on
Soma Konate
Comments